memories ...

memories ...
Posts tonen met het label Belgian food. Alle posts tonen

zondag 31 mei 2015

Belgian meat stew

Ask Belgians (that are not vegetarian) what their favourite food is and a lot will answer you it's Belgian beef stew and fries.


I say 'fries' because I don't want to imply they are a French invention. The art of fry-making is purely Belgian. Other cuisines make totally different fries: too thick, too thin, not twice fried in the proper temperatures ... For an overview of some differences between French and Belgian people, read this: Les trucs que les Belges font mieux que les Français It's in French so it's a good way to practice for the next visit to France or Belgium (or at least Brussels and the South) ;)


I'm not a big meat eater myself. I'm actually more of a flexitarian, eating fish and other kinds of meat but mostly vegetarian (and occasionally vegan). That's a decision I made out of two main ideas:
- First of all I don't really like most meats, I never liked them. You can't please me serving a big chunk of steak nor do pork chops look tempting to me. The only meat I like is meat that's 'hidden' or part of a larger dish, like a stew or a casserole.
- Secondly I don't like eating a lot of animal products because of the ecological point of view. The production of meat is so intensive and wasteful that's it's more logical and eco-friendly to eat more vegetarian dishes. Knowing that a lot of species around the world are in danger of going extinct due to loss of habitat or over-fishing, it's only better to be more conscious in what we eat. 

About 3 to 4 days a week I eat vegetarian/vegan, the other days I eat some kind of meat. When I leave my parents' home I see myself eating even less meat but for now I try to fit in the family dinner rotation also.

Well, today I made meat stew. Not beef stew because I think pork chops are better in taste (more fat content that is) and get soft more easily than the tough beef.
The ingredient that makes our stew Belgian is the beer and the mustard. Without those two it wouldn't be the same.
To serve this, we had (Belgian) fries and chopped salad and tomatoes. With mayonaise of course. Other ways to serve the stew are with cooked potatoes and apple sauce or red cabbage. 


Ingredients for 4:
- 4 pork chops
- 2 bay leaves
- knob of butter
- 1 medium onion
- pepper and salt to taste
- 1 package of Knorr stew seasonings (if not available: two pieces of white bread without crust with mustard on top)
- 1 tablespoon of mustard
- 1 bottle of beer (any kind, we use a less expensive one as the better beers are for drinking purposes in our eyes) of 33 cl
- a little water if needed
- raisins, dried apricots, dried prunes, ... (dried fruits in general), chopped

How to:
Chop the onion. Put some pepper on the chops. 


Heat the butter in a pan and sear the chops on both ways. Take out of the pan and put in a large pot with a good lid. Then brown the onions a little. Put the beer in the pan with the onions once they're browned so that the meat juices and pieces from the bottom loosen up.


Put this all in the pot along with the meat. Add the mustard, the bay leaves, extra pepper and salt (only use salt if you're not using the seasoning as the seasonings are salty on their own), the dried fruit and the mustard coated bread slices (again: when using the seasoning, this is only optional as they are needed for binding purposes).


Get everything boil a minute or two and put the lid on.


Then bring the fire to 'low' and let the stew simmer for at least 1,5 to 2 hours. Check whether the meat is softened.
Mix the seasonings with a little water and blend the mixture through the sauce.


Let cook along on medium heat for 5-10 minutes. Check the taste and add salt or pepper to taste.


Serve.

Stews get better when they stand. Making this a day ahead or in the morning is best but not needed.

Smakelijk!


woensdag 27 mei 2015

Daring Bakers' May challenge: Lamingtons

For the May challenge, Marcellina from Marcellina in Cucina dared us to make Lamingtons.
An Australian delicacy that is as tasty as it is elegant.

This is my very first challenge as I only joined Daring Bakers' last month. I was attracted to the idea of trying new things, trying things that might be out of my comfort zone. I never followed any classes, I am a self taught cook and baker and I manage okay even with the few handicaps I have: I don't own scales so I always measure my amounts in spoonfuls. On top of that I live with my critical family that' liked to stick with their favourites. Daring Bakers will hopefully help me in taking up challenges I wouldn't normally try.


This month's challenge is Lamingtons. They are in essence bite sized sponges soaked in chocolate frosting and then tossed in dessicated coconut.
This is what they normally look like:


This is what I made:


The challenge stated that we had to make Lamingtons by making bite sized pieces of sponge or butter cake, soaked in a frosting and rolled in any kind of outer layer 'as to avoid messy fingers'. The cake could be scented or flavoured any way we liked and also for the frosting and the outer layer, we were free to choose whatever we liked.

As much as I liked the classic flavour combination, I decided to make something different too. With so much freedom, I thought about which flavours combined well and my mind was set on the flavours of a classic frangipane. Frangipane is a very popular tart that is made of an outer crust on which (usually apricot) jam is spread and which is then filled with a mixture of ground almonds, sugar, butter and eggs. The sweet filling combines well with the tanginess of the jam and that's what I wanted to recreate with my Lamingtons.

I scented the cake with almond extract to have that typical frangipane flavour. I then used strawberry jam to coat the pieces of cake and next I rolled them in ground almonds. I also decided to half the cake recipe as 12 Lamingtons would be enough for us to eat so I made 6 classic ones and 6 frangipane-inspired ones. 


the frangipane inspired ones with almond and jam


the classic Lamingtons with coconut and chocolate 

I made the cake the evening before and the cake looked very good, fresh from the oven, which was promising. As the recipe stated, I let the cake stand overnight to be able to cut it nicely the following day.

I invited a friend over and his verdict was very positive. He called them delicious. He tried both of the variations and loved them equally. He took home some other Lamingtons fo his girl friend to try as well. Hope she likes them just as much!
My mum came home and was in love with the frangipane inspired Lamingtons so I dare say they were a hit. And my own opinion: I loved the classic ones but that's no surprise because I'm a big lover of chocolate and coconut anyways.

With these kind of reviews and the ease to make this for the first time, I will make these again :D

Ingredients for cake:


- 2 eggs, 1 egg yolk
- 112,5 grams of sugar
- pinch of salt
- 100 grams corn starch (Maizena)
- 3/4 teaspoon baking powder
- 1/2 teaspoon almond extract
Ingredients for icing:
- apricot/strawberry/... jam (about 4 tablespoons)
- 30 ml milk
- 1 tablespoon of cocoa powder
- 100 grams confectioner's sugar
Ingredients to coat the Lamingtons:
- 75 grams ground almonds (I ground whole almonds in the food processor)/dessicated coconut
- 75 grams dessicated coconut
How to:
Preheat the oven to 180°C.
Butter an ovenproof dish (15 x 20 cm) and line the dish with parchment paper so that the cake won't stick to the dish later on.


Mix the eggs and the sugar for at least 5 to 10 minutes with a hand mixer on high. The mixture should be whitish and frothy.
Add the almond extract and mix another couple of minutes.
With a regular spoon, fold in the corn starch, the salt and the baking powder.
Put the batter in the lined dish and make sure that the batter is evenly distributed.

Put in the oven and bake for 22 to 25 minutes. Don't open the oven during baking. When ready, the cake should feel light and springy.
Let cool overnight in the dish. 


the cake will flatten while cooling

The next day, cut the cake in 12 pieces (I used a bread knife which cut clean pieces without crumbling the cake down). 


Warm the apricot/strawberry jam slightly to make it more pourable. Cut the cake pieces you're going to use in half and spread some jam in between so you get a little sandwich. Dip the 6 pieces of cake in the jam. Then roll them in the ground almonds one by one.
Warm the milk, cocoa and confectioner's sugar au bain marie (put a bowl into a pot of warm water to heat indirectly) until all is warm and dissolved. Dip the 6 other pieces of cake in this icing and roll them in the dessicated coconut.
Put them on a wire rack or on parchment paper for at least half an hour and up to 2 hours.


don't they look pretty on the inside as well?

from every angle ...
Ready to serve :)

Smakelijk!


vrijdag 15 mei 2015

Speculoos cookie tart

I know you all know Biscoff spread, the spread that has quickly won the hearts (and taste buds) of many over the last few years. Did you know it's Belgian? 

A few years ago we had a TV show about a competition for the best inventions. One of the competitors was a mother who'd invented a tasty spread for her children based on our Belgian speculoos cookies. She didn't win the competition but she did develop the spread with the company that produces the speculoos: Lotus. 


In Belgium it became known as 'speculaaspasta' (speculoos spread) but of course that would be quite hard for an English native to pronounce so Biscoff spread became the regular name in the English speaking world. 

I used this spread to make a cookie tart. I've seen quite some cookie tarts or monster-sized cookies around the blog world, but I wanted to try something different from the chocolate chip variety.

It's something you can whip up in barely a few minutes, it's as simple as that!

Ingredients:
- 6 tablespoons of Biscoff spread
- 100 grams light brown sugar
- 3 tablespoons of Greek yogurt
- 1 teaspoon of baking powder
- 1 teaspoon of corn starch
- 230 grams flour
- 1/4 teaspoon salt
- 1 egg
- 10 speculoos cookies (optional), crumbled

How to:
Preheat the oven to 180°C.
Mix the Biscoff spread with the sugar and the yogurt. Add the egg and mix.

One after the other, mix in the baking powder, the salt, the corn starch and the flour. You'll get a firm dough that doesn't stick to the bowl when stirred.
Butter and flour a round tart tin. 
With your hand, put the dough in the tart form and press the dough with your fingers until it is even all around. Optionally, you can sprinkle the speculoos crumbles over the dough. 


Put in the hot oven and bake for approximately 20 minutes.
It will still be soft in the middle but that's normal. 
Let cool slightly and deform on a plate. 
Cut in wedges and serve.

Smakelijk!

woensdag 13 mei 2015

Sandwiches for lunch

Busy times call for easy meals. On top of that, the weather is great so I'm craving salads and vegetables all the time. 

For lunch today, I made some very tasty and super easy sandwiches.

I took some white bread slices, cut them in half and put two halves at the time in the toaster. 
After they were just golden brown and crispy, I put some Passendale* cheese on top and finished the sandwich by adding slices of cooked beetroot and a little rocket. After putting the other half of the slice on top, I could indulge.


Nothing fancy, just soooo good. 


*Passendale cheese is a Belgian cheese variety that is kind of sweet in taste and it looks pretty as well with all the little holes everywhere. This is how it looks like:


This is a great combination in Summer I think. Nothing heavy on the stomach and healthy. It would've been much more healthy on a wholewheat bread slice but I didn't have the right kind available at home. 

Smakelijk!


zondag 26 april 2015

Croque monsieur: our grilled cheese sandwich

I follow a number of food blogs and what struck me most this month are the numerous grilled cheese recipes. I gathered that April being the national grilled cheese month is huge in blog space. Now, as a citizen of Belgium, I cannot participate in it nor share this 'national'/American month dedicated to the love for cheesy sandwiches. 


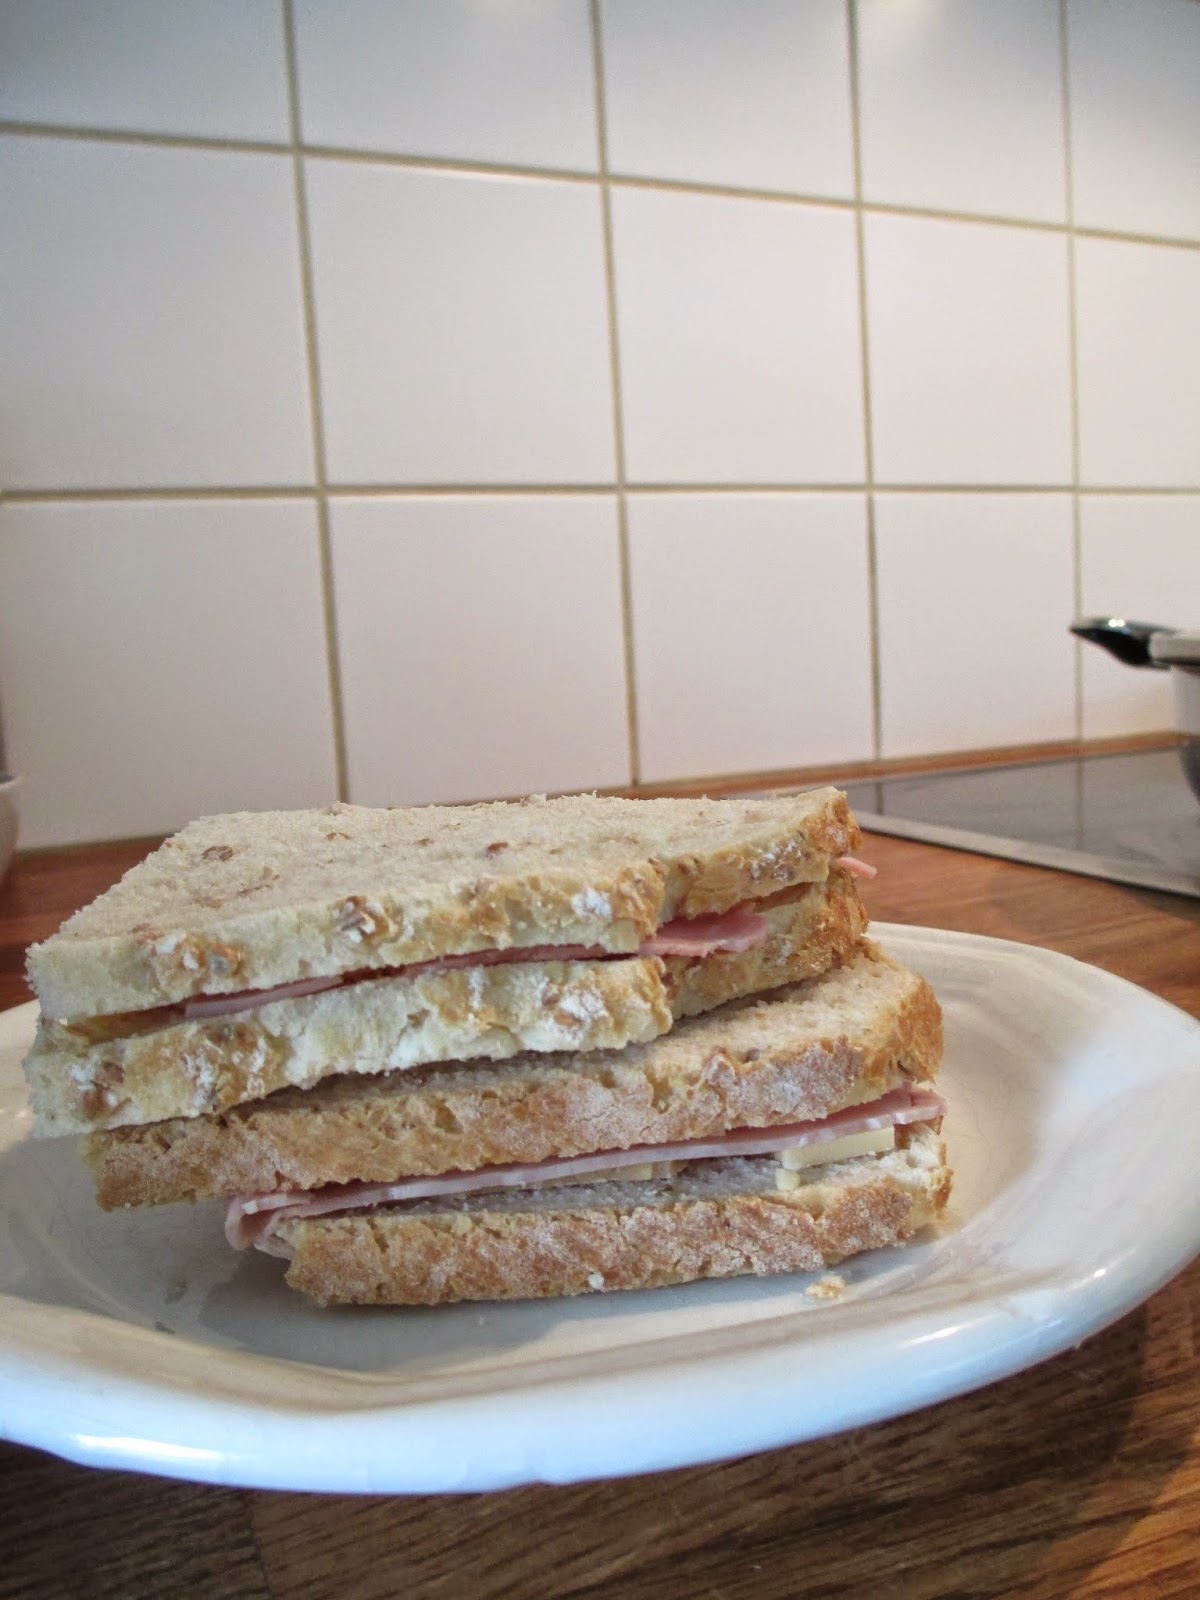
thinly pressed croque monsieur, a salad (must)
and some curry ketchup

But that doesn't mean we don't know anything about grilled cheese at all. We in Belgium, however, do have our own terminology for these kind of sandwiches. They are all French in origin and even though most of us speak Dutch in Flanders, no one bothers to translate the terms. They are concepts. (In the Netherlands they call these tostis, they do translate the term as you see)
A few examples of classics in the grilled cheese category are:
- croque monsieur: a sandwich filled with cheese and cooked ham 
- croque madame: a sandwich filled with cheese and cooked ham with an egg (sunny side up) on top after toasting
- croque hawaï: a sandwich filled with cheese and cooked ham with in the middle a slice of pineapple
Sometimes we also add a pinch of cayenne or chili in between the slices of bread. To add a little kick and especially with the croque hawaï this is highly recommended!
And to serve we take some tomato ketchup or mayonaise (or a combination of the two: cocktail sauce) and a salad as a side. Great meal!
All of these are then toasted in a frying pan with some butter or a croque monsieur machine (my preferred method because lots less greasy!). In the machine, you can make the washing up also a lot easier by placing some parchment paper between the machine and the sandwich. The paper will prevent the cheese from burning onto the machine and the clean up no work at all.


The cheese is the commonly found cheese variety like Gouda (this is a Dutch type of cheese and is pronounced  with an 'OU' like in MOUSE, just saying dear English natives!) but this really is according to everyone's taste.
The bread most people use is white bread. Some use special toast bread (pre-packed rectangular loaves) but the best way is of course some good bread from the bakery. Whole wheat bread is not often used as it's not the classic way and it just gives another end result, a different taste. My way to make things a little healthier is taking some slices of a light version of whole wheat bread (half whole wheat). Dark brown varieties of bread definitely aren't favorites around here for grilling ...


You see they are all very basic. Of course we also eat other fillings but we tend to stick to our old time favourites. Talking about our family: when we think about using pesto, vegetables or different kinds of meat on a sandwich, we don't often use normal sliced bread. Because of the richer fillings, we make the whole thing more stylish by using at least a French loaf, a ciabatta or another kind of more elegant bread. For more unusual fillings we go for the more unusual breads as well. 

The logic behind this is that croques in general are very common basic ways to use up some bread. Ham and cheese are also things we as a bread-loving people, always have in the fridge. We don't see grilled cheese as special dish, just another way of eating our slices of bread (as we eat bread for breakfast and for lunch every day). Something hot as lunch is a good alternative from time to time. 
Other fillings are not always common cupboard/fridge items, we need to buy them specially and if we do this, we can just as well buy an specialty bread.  

I saw a few very tasty things the last few weeks. Grilled cheese month is being celebrated all around and these are some I would love to try: 

Roasted red pepper, aragula and mozzarella sandwich from Two Peas and Their Pod, with a salad of aragula, tomatoes and pine nuts, this would be wonderful. 

Goat cheese, kalamata olive tapenade and grilled pepper panini by Pinch of Yum, as a lover of goat cheese it is looking delicious!

Grilled chicken and roasted red pepper sandwich from Pioneer Woman, I wouldn't make this with as much butter but the combination of flavour attracts me

Fig, brie and apple grilled cheese, also from Two Peas and Their Pod, I think many would like this with a salad and some crushed walnuts. 

Smakelijk! 

dinsdag 21 april 2015

Belgian (Brussels') waffles

What do people say when you ask them what they know about Belgium. There are two possibilities for this situation. In the first possible reaction, people stand and stare at you with their mouths wide open and, sometimes stammering something like 'Isn't Belgium the capital of Brussels?' (it's the other way round if you're wondering).
The second possible reaction is the most heard one. As a Belgian girl, I've heard people say the same things all the time: Belgium is the land of war (a term loosely interchangeable with political crisis for some), beer, chocolate and waffles. 


I'm an atypical Belgian because I'm not a huge lover of waffles and I dislike beer of all sorts. Saying you don't like these things is not a good idea when you try to be popular in Belgium. With hundreds upon hundreds of beer varieties, from sour over bitter to somewhat sweeter beers, there is a lot of it to choose from but so far I haven't met my match. 
Luckily I fit in because of my huge love of chocolate. I make cakes (my favourite) and biscuits with it and love eating it in a lot of ways. I have my ritual cup of hot chocolate nearly every winter night and I make single servings of cookies or cakes filled with chocolate just to have chocolate every day. 

Now, back to the goal of this post: I was going to introduce you to Belgian waffles. 
Belgian waffles do not exist for a start. This may come as a shock because abroad all they talk about is BELGIAN waffles. 
To clear this out for once and for all: there are a few varieties of waffles that are typical in Belgium. They are also acknowledged as regional specialties so we don't joke around with these. 

First of all, the waffles everyone calls Belgian are known as Brussels' waffles (Brusselse wafels). They are the one made with a yeast batter and that have a rectangular shape. They don't contain sugar and are served with whipped cream and icing sugar. Most people eat them plain like that but we also serve them with strawberries and that's a very nice addition.
I am not a huge fan of waffles but baking a sliced apple and some cinnamon in the batter while it bakes is very gooood! (a must try and the apple gives you all the more reason to eat them because the apple = fruit = healthy)


Secondly there are the sweet waffles, the so called Luikse wafels (waffles from Liège or gaufre de Liège). These are the rounded waffles made with sweet batter and these contain big sugar cristals. They are best eaten warm but they are also sold in supermarkets as snacks and these are cold of course (Suzy waffles for example).
When you walk in the streets of Belgium, especially during the colder Autumn and Winter months, you are literally drawn to the baking stands where they serve these waffles. The smell is irresistible and eating it when it's chilly warms you inside. Of course these waffles contain lots and lots more calories than their counterparts from Brussels. They are served plain and that is the best way. For tourists, the waffle stands serve these waffles also with chocolate sauce, whipped cream, strawberries, ... but trust me: they are more than sweet and tasty enough on their own and you'll just spoil the experience when you top them with extras.

My dad loves Brussels' waffles and one of the main reasons is his life long love of the series Nero. It's a comic book series by Marc Sleen about the adventures of Nero and his family and friends. Every story ends with a long table on which piles of waffles are being served for every character of the story. This end is called 'de wafelenbak' (the baking of the waffles). My dad insists on having a wafelenbak with these waffles a few times a year and for this occasion we always ask people around because it's a fun way to get together. 


As you see, unlike the customs in America for example, we Belgians don't see waffles as breakfast items. We serve them in the afternoon as a snack shared with family or friends and often there is enough to replace dinner with them.


A typical wafelenbak. Nero is on the far left. On this picture,
Marc Sleen (the author of the series) is also invited to eat
some waffles and he's the 4th person on the right. 


In our home town, Sint-Niklaas, we have an actual monument for Nero and his friends, next to the public library:


To make Brussels' waffles is not something you can do in a whim. You need time. Not because it's that hard to make or so time consuming but because the batter needs to rise at least a few hours and preferably about a whole day. 
You need to plan these waffles. Maybe this is a good reason why people here don't serve them for breakfast when everyone is rushing to get out of the house in time for work or school.

Also the best way to make these is in a big batch. The ingredients below are enough for 4 people but we usually make them for at least 8 people and we often triple the recipe just to have enough. Any left over can be eaten afterwards. You either not bake a part of the batter and bake fresh waffles the next day or you bake all of the batter and eat the waffles cold.

Ingredients:
- 500 grams plain flour
- 7 grams or one package of instant yeast powder
- 200 grams butter
- 1/2 liter milk, lukewarm
- 1/2 liter water (sparkling water or beer can be used to make an even lighter batter)
- 4 eggs
- vanilla essence
- 5 grams salt

How to:
Mix the yeast powder with the water.
In a deep (!) and large (!) pot, pour in the flour and make a hole in the middle. Pour the yeast and water mixture in the hole in the flour.
When you've let the yeast stand there for a while, pour in the lukewarm milk and add the egg yolks as well. Mix this batter thoroughly.
Melt the butter and add it to the batter, mix well. Then add the vanilla essence and the salt. Mix well.
Beat the egg whites until firm. Gently add them to the batter by stirring them in with a wooden spoon.


Put the lid on the pot and put the pot on a warm place in the house. Best is in the kitchen. I put the pot on top of the dishwasher that was on so that the warmth of the machine could help the batter rise.
Give the batter at least a few hours. Check regularly without wiggling the batter so that it won't sink. Just pull off the lid and check whether or not the batter has doubled in size. We always make the batter in the morning and bake in the late afternoon. 
When ready to bake, heat the waffle iron. When it's hot, grease the iron with neutral oil and ladle enough batter to fill the holes of the waffle iron. 

this is a very full waffle iron!
(it was the left over batter I squeezed
in all at once in the end), you see the
bubbles coming up

Close the iron and don't open it for at least one or two minutes. Check very carefully. When the iron can be opened without breaking the waffle, the waffle is done. You can leave it in for a little longer when you like them browned some more. 

ready!

Serve with lots of whipped cream (mixed with some icing sugar to taste), strawberries and icing sugar.

Smakelijk!