memories ...

memories ...

zondag 26 april 2015

Croque monsieur: our grilled cheese sandwich

I follow a number of food blogs and what struck me most this month are the numerous grilled cheese recipes. I gathered that April being the national grilled cheese month is huge in blog space. Now, as a citizen of Belgium, I cannot participate in it nor share this 'national'/American month dedicated to the love for cheesy sandwiches. 


thinly pressed croque monsieur, a salad (must)
and some curry ketchup

But that doesn't mean we don't know anything about grilled cheese at all. We in Belgium, however, do have our own terminology for these kind of sandwiches. They are all French in origin and even though most of us speak Dutch in Flanders, no one bothers to translate the terms. They are concepts. (In the Netherlands they call these tostis, they do translate the term as you see)
A few examples of classics in the grilled cheese category are:
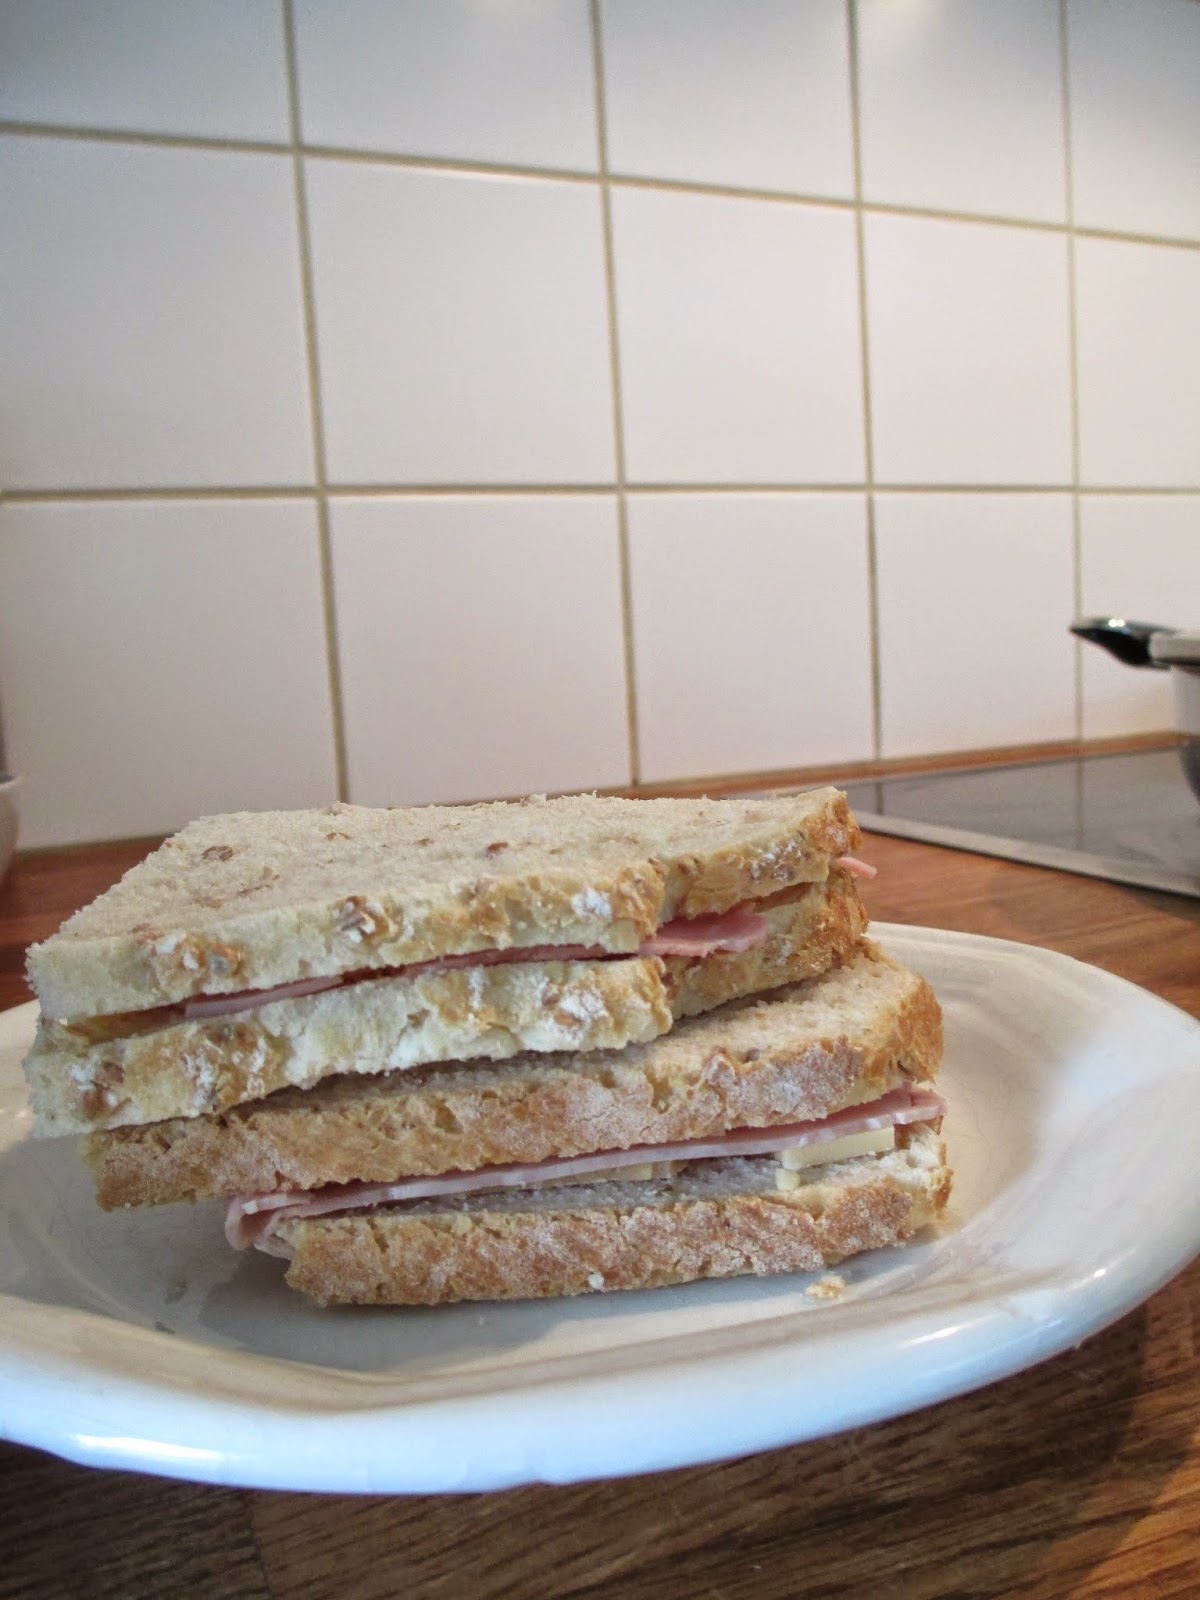
- croque monsieur: a sandwich filled with cheese and cooked ham 
- croque madame: a sandwich filled with cheese and cooked ham with an egg (sunny side up) on top after toasting
- croque hawaï: a sandwich filled with cheese and cooked ham with in the middle a slice of pineapple
Sometimes we also add a pinch of cayenne or chili in between the slices of bread. To add a little kick and especially with the croque hawaï this is highly recommended!
And to serve we take some tomato ketchup or mayonaise (or a combination of the two: cocktail sauce) and a salad as a side. Great meal!
All of these are then toasted in a frying pan with some butter or a croque monsieur machine (my preferred method because lots less greasy!). In the machine, you can make the washing up also a lot easier by placing some parchment paper between the machine and the sandwich. The paper will prevent the cheese from burning onto the machine and the clean up no work at all.


The cheese is the commonly found cheese variety like Gouda (this is a Dutch type of cheese and is pronounced  with an 'OU' like in MOUSE, just saying dear English natives!) but this really is according to everyone's taste.
The bread most people use is white bread. Some use special toast bread (pre-packed rectangular loaves) but the best way is of course some good bread from the bakery. Whole wheat bread is not often used as it's not the classic way and it just gives another end result, a different taste. My way to make things a little healthier is taking some slices of a light version of whole wheat bread (half whole wheat). Dark brown varieties of bread definitely aren't favorites around here for grilling ...


You see they are all very basic. Of course we also eat other fillings but we tend to stick to our old time favourites. Talking about our family: when we think about using pesto, vegetables or different kinds of meat on a sandwich, we don't often use normal sliced bread. Because of the richer fillings, we make the whole thing more stylish by using at least a French loaf, a ciabatta or another kind of more elegant bread. For more unusual fillings we go for the more unusual breads as well. 

The logic behind this is that croques in general are very common basic ways to use up some bread. Ham and cheese are also things we as a bread-loving people, always have in the fridge. We don't see grilled cheese as special dish, just another way of eating our slices of bread (as we eat bread for breakfast and for lunch every day). Something hot as lunch is a good alternative from time to time. 
Other fillings are not always common cupboard/fridge items, we need to buy them specially and if we do this, we can just as well buy an specialty bread.  

I saw a few very tasty things the last few weeks. Grilled cheese month is being celebrated all around and these are some I would love to try: 

Roasted red pepper, aragula and mozzarella sandwich from Two Peas and Their Pod, with a salad of aragula, tomatoes and pine nuts, this would be wonderful. 

Goat cheese, kalamata olive tapenade and grilled pepper panini by Pinch of Yum, as a lover of goat cheese it is looking delicious!

Grilled chicken and roasted red pepper sandwich from Pioneer Woman, I wouldn't make this with as much butter but the combination of flavour attracts me

Fig, brie and apple grilled cheese, also from Two Peas and Their Pod, I think many would like this with a salad and some crushed walnuts. 

Smakelijk! 

dinsdag 21 april 2015

Belgian (Brussels') waffles

What do people say when you ask them what they know about Belgium. There are two possibilities for this situation. In the first possible reaction, people stand and stare at you with their mouths wide open and, sometimes stammering something like 'Isn't Belgium the capital of Brussels?' (it's the other way round if you're wondering).
The second possible reaction is the most heard one. As a Belgian girl, I've heard people say the same things all the time: Belgium is the land of war (a term loosely interchangeable with political crisis for some), beer, chocolate and waffles. 


I'm an atypical Belgian because I'm not a huge lover of waffles and I dislike beer of all sorts. Saying you don't like these things is not a good idea when you try to be popular in Belgium. With hundreds upon hundreds of beer varieties, from sour over bitter to somewhat sweeter beers, there is a lot of it to choose from but so far I haven't met my match. 
Luckily I fit in because of my huge love of chocolate. I make cakes (my favourite) and biscuits with it and love eating it in a lot of ways. I have my ritual cup of hot chocolate nearly every winter night and I make single servings of cookies or cakes filled with chocolate just to have chocolate every day. 

Now, back to the goal of this post: I was going to introduce you to Belgian waffles. 
Belgian waffles do not exist for a start. This may come as a shock because abroad all they talk about is BELGIAN waffles. 
To clear this out for once and for all: there are a few varieties of waffles that are typical in Belgium. They are also acknowledged as regional specialties so we don't joke around with these. 

First of all, the waffles everyone calls Belgian are known as Brussels' waffles (Brusselse wafels). They are the one made with a yeast batter and that have a rectangular shape. They don't contain sugar and are served with whipped cream and icing sugar. Most people eat them plain like that but we also serve them with strawberries and that's a very nice addition.
I am not a huge fan of waffles but baking a sliced apple and some cinnamon in the batter while it bakes is very gooood! (a must try and the apple gives you all the more reason to eat them because the apple = fruit = healthy)


Secondly there are the sweet waffles, the so called Luikse wafels (waffles from Liège or gaufre de Liège). These are the rounded waffles made with sweet batter and these contain big sugar cristals. They are best eaten warm but they are also sold in supermarkets as snacks and these are cold of course (Suzy waffles for example).
When you walk in the streets of Belgium, especially during the colder Autumn and Winter months, you are literally drawn to the baking stands where they serve these waffles. The smell is irresistible and eating it when it's chilly warms you inside. Of course these waffles contain lots and lots more calories than their counterparts from Brussels. They are served plain and that is the best way. For tourists, the waffle stands serve these waffles also with chocolate sauce, whipped cream, strawberries, ... but trust me: they are more than sweet and tasty enough on their own and you'll just spoil the experience when you top them with extras.

My dad loves Brussels' waffles and one of the main reasons is his life long love of the series Nero. It's a comic book series by Marc Sleen about the adventures of Nero and his family and friends. Every story ends with a long table on which piles of waffles are being served for every character of the story. This end is called 'de wafelenbak' (the baking of the waffles). My dad insists on having a wafelenbak with these waffles a few times a year and for this occasion we always ask people around because it's a fun way to get together. 


As you see, unlike the customs in America for example, we Belgians don't see waffles as breakfast items. We serve them in the afternoon as a snack shared with family or friends and often there is enough to replace dinner with them.


A typical wafelenbak. Nero is on the far left. On this picture,
Marc Sleen (the author of the series) is also invited to eat
some waffles and he's the 4th person on the right. 


In our home town, Sint-Niklaas, we have an actual monument for Nero and his friends, next to the public library:


To make Brussels' waffles is not something you can do in a whim. You need time. Not because it's that hard to make or so time consuming but because the batter needs to rise at least a few hours and preferably about a whole day. 
You need to plan these waffles. Maybe this is a good reason why people here don't serve them for breakfast when everyone is rushing to get out of the house in time for work or school.

Also the best way to make these is in a big batch. The ingredients below are enough for 4 people but we usually make them for at least 8 people and we often triple the recipe just to have enough. Any left over can be eaten afterwards. You either not bake a part of the batter and bake fresh waffles the next day or you bake all of the batter and eat the waffles cold.

Ingredients:
- 500 grams plain flour
- 7 grams or one package of instant yeast powder
- 200 grams butter
- 1/2 liter milk, lukewarm
- 1/2 liter water (sparkling water or beer can be used to make an even lighter batter)
- 4 eggs
- vanilla essence
- 5 grams salt

How to:
Mix the yeast powder with the water.
In a deep (!) and large (!) pot, pour in the flour and make a hole in the middle. Pour the yeast and water mixture in the hole in the flour.
When you've let the yeast stand there for a while, pour in the lukewarm milk and add the egg yolks as well. Mix this batter thoroughly.
Melt the butter and add it to the batter, mix well. Then add the vanilla essence and the salt. Mix well.
Beat the egg whites until firm. Gently add them to the batter by stirring them in with a wooden spoon.


Put the lid on the pot and put the pot on a warm place in the house. Best is in the kitchen. I put the pot on top of the dishwasher that was on so that the warmth of the machine could help the batter rise.
Give the batter at least a few hours. Check regularly without wiggling the batter so that it won't sink. Just pull off the lid and check whether or not the batter has doubled in size. We always make the batter in the morning and bake in the late afternoon. 
When ready to bake, heat the waffle iron. When it's hot, grease the iron with neutral oil and ladle enough batter to fill the holes of the waffle iron. 

this is a very full waffle iron!
(it was the left over batter I squeezed
in all at once in the end), you see the
bubbles coming up

Close the iron and don't open it for at least one or two minutes. Check very carefully. When the iron can be opened without breaking the waffle, the waffle is done. You can leave it in for a little longer when you like them browned some more. 

ready!

Serve with lots of whipped cream (mixed with some icing sugar to taste), strawberries and icing sugar.

Smakelijk!

maandag 20 april 2015

Trifles to share

If you ever wonder what to do with some cake that's left over, some cream in your fridge that needs to be used up or any type of fruit that's begging to be eaten soon, some booze in the cupboard, look no further: it's time for trifles!


Trifles are super simple and what I'm showing you isn't really a recipe. If you have above mentioned ingredients, you don't need to rush out to get something else (necessarily - unless you want to make them without having left overs or want to fancy things up with extras of course). 

Let me tell you the story of the heavy cream in the fridge:
At home we made waffles a couple of weeks ago for a bunch of family members that came over. In our waffle craze, we thought it was wise to buy more of every ingredient, just in case anyone went hungry (this is a typical Belgian trait, we always tend to buy a lot and serve a lot, even though we have already planned to eat something else the next day and won't be doing anything with the left overs ...). We didn't buy one liter of heavy cream but TWO. Two liters is a lot, I can tell you. Even after eating a pile of waffles each, the 10 of us, there was one and a half liters of cream left. Luckily we only whipped up one liter that time so we only needed to worry about working half a liter up as soon as possible. The other box would keep longer in the fridge. We made chocolate mousse with the left over half liter and that was that.


This week, we checked the box of heavy cream that had been in our fridge for weeks and we saw it was to be eaten this week unless we wanted to throw it away. 
What to do? What to do? We thought about inviting some extra people and eat waffles and my dad was all crazy about that idea as he LOVES waffles but we decided against it. Waffles for dinner two times in a month is really too much. 
Plan B was to prepare a number of things to use the cream up: we could use some for pasta alfredo and have a layer cake with whipped cream (these two things are going to be served to us and a bunch of family members who are again helping us out ^^)

For the cream that would be left (because pasta and cake on one night made with that much cream is a major attack on about everything healthwise), we would bake a batch of waffles for dessert for dad (waffles, strawberries and whipped cream, he'll be in heaven). And as 
I also had one piece of cake left over, it was decided I could make trifles. 

How to do this? Well that's very easy and a lot of fun with some children as well!

Take a piece of cake (regular, vanilla, yogurt or even chocolate), some fruit (berries are wonderful but it's all your choice), whipped and sugared heavy cream (40% fat is what I use). Those are the main ingredients but the trifle can be fancied up with a type of alcohol like Amaretto/marsala or decorated with almond slivers, grated coconut, chocolate sprinkles, ... The possibilities are endless: If you don't have cake, take biscuits and crumble them. If you don't have whipped cream on hands, use some vanilla custard.
The amount of each is not very important, if you prefer or have less of the cake it will be less heavy and more fruit makes it healthier.


Cut the cake in small cubes and sprinkle some drops of the alcohol on it if you like. I used some marsala for the almond flavour it gives. For my two glasses of trifle, I used 1 large piece of cake.


Take some fruit and cut it in smaller pieces. Fruit like raspberries don't need to be cut up, they're the right size. I cut the strawberries however, to have pieces the size of raspberries. When the fruit has the same size, it'll be a more even trifle in the end. I used couple of strawberries and raspberries. I didn't have them so I specially went to the shop for them, just because I wanted to eat berries in the trifle and not any other fruit (but that's me). 


Whip up the heavy cream with some icing sugar to taste. 

Then it's time to make the layers: Take a tall glass or any glass of any size you like. I took some larger round glasses and this makes these trifles BIG. Good to share or for big appetites :)  Smaller glasses are good when you need some portion control or when you serve it after heavy main courses.
With a little help from some spoons, layer the ingredients. I started with some cream, then some fruit and then cake cubes. You keep on layering until you've filled the glass. Anything left over can be eaten by the cook, the dog or anyone who's eyeing you hungrily. 

I wanted to decorate a bit with almond slivers but I couldn't find them. They must have been used up. But as they are just extra, no worries.

Put the glasses in the fridge until you serve them. 

Smakelijk!  

zaterdag 18 april 2015

Grape and yogurt cake

Weekend equals baking. Actually, any day I have time on my hands is a baking day. To my parents and sister and about every person who knows me a bit, it's not a surprise I baked a cake again. It's a good thing they've got good appetites!

I got some inspiration through the blog Laws of the kitchen. There I found a post about a grape harvest cake that looked really good. That cake was based on this recipe of grape harvest cake. I hadn't ever thought of using grapes in a cake or any other baked goods. I thought of grapes as fresh fruit and maybe a nice addition to hearty dishes like stews. This was a totally new thing for me. 


I took the recipe and by making some changes to the recipe I turned it into this cake. 
Below you'll find how I made it. 

Ingredients
- 200 grams vanilla scented sugar
- 100 grams light brown sugar
- 50 grams instant vanilla custard powder (I use Oetker)
- 260 grams plain flour
- 1 packet of baking powder (about 20 grams)
- 7 tablespoons of butter
- 236 ml milk

- zest from 1 orange
- 1 teaspoon salt
- grapes (I used about 20 pieces)
- 150 grams Greek yogurt

- 4 eggs
How to:
Preheat the oven to 160°C.
Mix the flour, the baking powder, the salt and the vanilla custard powder together.
Warm the milk and the butter with the orange zest until the butter is melted.

Crack the eggs in the bowl with the sugar and whisk with an electric mixer until the egg mixture is very frothy and light coloured. 


Mix the yogurt in the egg mixture. Whisk.
Mix half of the flour mixture in. Whisk.
Mix half the milk mixture in. Whisk.
Mix the rest of the flour mixture in. Whisk.
Mix the rest of the milk mixture in. Whisk.

Put the grapes in the batter and pour everything in a buttered and floured cake tin (I used a spring form tin of about 26 cm diameter)


Put in the oven and bake for about 50 minutes or until the cake feels firm when touched.
Take the cake out and let cool slightly. 

Take the cake out of the form, carefully because the grapes might stick to the sides and the bottom.


For serving: dust the cake with some icing sugar for a prettier look. 


My mum is my usual taste-tester and she liked it. She said that the grapes resemble raisins or currants but different. The orange zest wasn't that present but it was good, she said.
She happy, me happy!
I took a piece as well and liked it as well. It's a dense cake and I would make it again as it has a hint of citrus, a good vanilla flavour and the grapes make the cake juicy. 

Smakelijk!

Salmon wrap bites

My sister's boyfriend is celebrating his 26th birthday tomorrow and my sister wants to surprise him with a small get-together with all of his friends in the local park. They're going to play some outdoor games like kubb and petanque. She also wanted to have them some snacks to eat in the meanwhile. She made some things for him like mini fritattas. I offered to help her with something and I made for them small snacks:


packed up to go ...

These are basically wheat tortillas filled with a yogurt-cucumber sauce (look for the recipe to the post of Wednesday) and smoked salmon.
It's a very easy way to serve something festive on a party because the colours are so beautiful together and the taste is just perfect.
Many people who make these kind of wraps fill the tortillas with a herbed cream cheese spread instead of the yoghurt sauce. I, however, prefer a yogurt sauce for two reasons. The first reason is that it is much lighter. The salmon on itself is quite heavy and in combination with cream cheese, the snacks fill you up immediately and that's not the purpose of a snack. The snack should be tasty without taking up all the room in your tummy as there is more to follow ;)
The second reason is because the tortillas are quite dry when filled with cream cheese. The yoghurt is more fluid and makes the wraps more juicy. And juicy is the way to go!

It's so easy that it isn't really a recipe at all but I'll show you the making of the wrap bites:

the cast of the characters:
sugar (1 ts), salt (pinch), black pepper (pinch),
cucumber (about 6 cm), smoked salmon (250 grams),
3 wheat tortillas, Greek yoghurt (150 grams)


the mixing of the sauce ingredients


heating the tortillas to make them more pliable


spreading the sauce on top of the tortillas and
putting the smoked salmon on top


rolling the tortillas


(view from another angle)
ready for an hour in the fridge


just after cutting in slices: ready to eat!

We all love these wrap bites and it's great for any party, fancy or informal.

I hope my sister and her company will love these this afternoon :)

Smakelijk!

Tofu-corn shoarma wrap

I made a tofu-corn shoarma recipe on Wednesday and I had some of the tofu left over. With it I made a very tasty wrap:


me eating the wrap

The wrap was filled with the following ingredients:
- grated beetroot
- grated carrot
- grated cabbage
- roasted red bell pepper
- tofu-corn shoarma  (recipe in previous post)
- my home made cucumber-yogurt sauce (recipe in previous post)

It was delicious and very easy and very Summery.

Smakelijk!

woensdag 15 april 2015

Home made fast food: veggie pita-shoarma

Summer is here! We had to wait for it a little longer than last year but finally we reached 25°C and could have our dinner in the garden. This is the start of the best time of year and what's better to do this than have an informal dinner with friends?

Here at home, we are no lovers of take-away. Apart from fried foods which I do not like myself in particular, I love all of the fast food kind of things. We regularly eat pizza, shoarma stuffed pita bread, chips, noodles, hamburgers... but we always make them ourselves.
(Apart from the occasional time we get home late and are too tired to cook and only feel like walking around the block to go get pita-shoarma)


Today we made pita-shoarma. Most of the time, we buy the breads, the meat and the vegetables we like and put everthing on the table for everyone to stuff his or her own pita. Today, however, I decided it was time to make an alternative to the meat version of pita shoarma. Of course we had falafel lots of times and it's delicious but extending the horizon is always good!

Making a veggie alternative of shoarma might be tricky because my dad is a very dedicated meat-lover. He doesn't even try veggie dishes and only eats vegetables when they're covered in white sauce, cheese or lots of butter. Vegetables to him are just for dressing up the plates.

The plan was to still have meat for dad and offer the others - we were the 8 of us, my family and friends - two other options: falafel and tofu-corn shoarma. We could try what would taste good and there was still some meat in case it was a fail. 

I took some inspiration from the Pioneer Woman who posted a recipe for vegetarian lettuce wraps (www.thepioneerwoman.com). She used tofu. I was interested in the idea of using tofu as well. It's very neutral of taste on it's own so it would be good to spice it up for the pitas. I made the recipe my own and posted it below. 

I must say I liked it a lot and I didn't miss the meat at all. I served it with a tzatziki-like sauce I made just before serving as I realised it would need some sauce. Even one of the friends who was at first not at all interested in veggie things and only wanted to stuff his bread with meat, tried it in the end and took some more!
Even though I prepared the tofu before and heated the skillet just before eating, the result wasn't at all dry. It was juicy, spicy, delicious!


I didn't take a picture of a stuffed pita so this is just some 
tofu-corn shoarma with grilled bell pepper

To make it just as I did, just follow the directions below:

Ingredients for the tofu-corn shoarma:
- neutral oil for the skillet
- 200 grams of tofu in small cubes
- 1 small can (140 grams) of sweet corn (drained)
- 1 table spoon of shoarma seasoning of your choice
- a small dash of balsamic vinegar
- a bit of chilli powder to spice it up
Ingredients for the tzatziki sauce:
- 150 grams Greek yoghurt
- 1/2 teaspoon of sugar
- salt and pepper to taste
- 6 cm of cucumber in very small cubes (I cut the piece of cucumber in 6 slices, cut strips from the slices and cut them in small cubes)


How to:
Heat the oil in the skillet and once it's heated, add the cubes of tofu. With a fork, break the cubes into even smaller pieces until it looks like minced meat. After a minute or two, add the drained sweet corn and let it simmer along with the tofu. Once the tofu and the corn are a little browned, add all the seasonings and the balsamic vinegar. 

For the sauce, just mix all the ingredients together and set aside, easy peasy.
Serve with the tzatiziki sauce, cubes of roasted sweet bell pepper, lettuce, grated beetroots and carrots, tomatoes and basically anything you might like on a pita bread. 


This is enough to fill about 4 to 5 small-sized pita breads. 

Smakelijk is all I can say!

dinsdag 14 april 2015

Baking with evaporated milk

I went to Costa Rica last year and spent 4 months in a host family and volunteered in different social and nature projects over there. 
Because of this time in a host family, you get to new local customs much easier than when you spend all your time in a hotel that is no different from whatever hotel anywhere else in the world. I loved it!


My host mum Cecilia was a real foodie. Her husband Carlos was in good hands because even though he didn't know a thing about cooking, he was fed very well.
She was about as old as my grandmother and just as my grandmother, she loved to cook (guess from who I got the foodie-genes).

She would stuff me every day. I got a huge breakfast every morning: always a plate of at least 4 types of fruit, tea (without milk, Belgian girls don't drink milk in their tea and even after trying, she couldn't convince me) and a changing assortment of dishes going from eggs and frijoles molidos to arepas (pancakes) and from toast with Costa Rican cheese to fresh French loaf grilled cheese sandwiches.
Every night I got a three course meal and convincing as she was, I always had seconds.
I obviously gained quite a bit of weight. Even after 2 food intoxications and all the symptoms that come with it, I gained 6 kilos!

I never complained and had the most memorable moments with them and their family. Especially Christmas and New Year's Eve were very good and even though my own family was far away in Belgium, I felt I was really part of their celebrations. 

On New Year's Eve there I had my first experience with queque con tres leches. It was Cecilia's daughter, a professional cook, who made it and it was soooo good. It was a very small piece and I just wanted more afterwards. 

Back in Belgium, I treated my family with some Costa Rican food. I also made a tres leches cake because I liked it so much. 
I bought all the ingredients and set to work. It was the first time to use evaporated milk and condensed milk. And the result was very nice. My family liked it but remarked that the pieces should have been a lot smaller. They were stuffed! I guess they were right, so many rich ingredients together made a very dense cake.

That was more than a year ago and this week I made my second attempt at baking with evaporated milk. I made a cake based on the recipe on pinchofym.com where Lindsay posted a nice looking marble cake made with evaporated milk. She warned her readers that the cake is addictive and also a lot of comments suggested that it was very worth making it. As I found my last attempt at baking with this milk very agreeable, I tried it.


I almost made the recipe completely according to the instructions of Pinch of Yum but added a chunk of dark chocolate to the dark batter so that the chocolate flavour would be axtra rich. I also had a slightly bigger can of evaporated milk so I multiplied everything by 1.5 to be able to use all of the can and not be left with a third of a can in the fridge. In Belgium we use the metric measures so I converted them also to work with. 

I baked the batter in a rectangular cake tin but after 45 minutes the batter still wiggled in the middle while the outer parts were set. Because of opening the oven before the middle was set, the cake collapsed. I was a bit impatient because I took the cake out of the oven anyway (I was also a bit scared the cake would dry out too much in the outer parts). 

I covered the top of the cake with some white chocolate and even though the cake wasn't a beauty and wasn't set at all in the middle, everyone liked it anyway. Eveything disappeared and this is the last piece which I will eat right now:


I guess if a cake is a success when it fails, the recipe is a keeper. You have to have a sweeth tooth of course, as the the combination of chocolate and sweet evaporated milk suggests.

Next time I will make cupcakes with this batter, they will set more easily and it's a much better way to have portion control ...

I recommend making this recipe also!

Smakelijk! 

From scratch ...

Hey you all!

This is me: Ijeoma, a Belgian girl of 24 ...


I am starting up this brand new blog because I noticed I couldn't edit my old blogspot (swedetandspicy.blogspot.be - don't mind the spelling mistake in the hyperlink, I was too eager to post my first message and entered submit without ever minding to check the spelling!).
I also made a blog about my travel to Costa Rica in 2013 (ijeomaincostarica.blogspot.be) but that's in Dutch and restricted to my travels there. 

Why do I start this blog page? I am very interested in many things: good books (from classics to entertaining novels), spending time with my friends, travelling, cooking and experimenting in the kitching, baking, nature in general and animals (big and small) in particular, ... and I would like to share some of these things with you. 

Also, I dared myself to try something new and decided to enter the community of Daring Bakers. Let's see if I can cope with the challenges presented!

My native language is Dutch, English is my second language but I would like to connect with people from around the world so English is my language of preference to write in. If you see any mistakes in my language: I would like to apologise in advance! 

Hope to see you here often!

Love, 
Ijeoma