memories ...

memories ...
Posts tonen met het label cake. Alle posts tonen

zondag 19 juli 2015

Alternative apple cake

We had two apples lying around and I had a craving for baking and eating something sweet. That much coincidence must lead to an apple dessert, don't you think? 

I saw a recipe for an Irish apple cake on The Baker Upstairs that looked lovely and I used the recipe for my version of the cake. I adapted it a bit to: (a) include some almonds that were lying around, (b) add some wholesomeness by adding oats to the flour content and (c) adding some vanilla too. My fourth alternation (my idea was to add some raisins to the apple mixture - I personally love the combination of apples and raisins ...) didn't get the approval of my dad and sister so wasn't executed. 
So the original recipe was only a guideline to the measurements for me :)


It's result was a tasty cake that wasn't heavy at all. 

Ingredients:
- 2 apples
- 1/2 teaspoon cinnamon
- 2 teaspoons white sugar
- 5 tablespoons oats, ground to resemble flour
- 4 tablespoons ground almonds
- 110 grams plain flour
- 50 grams vanilla pudding powder
- 150 grams white sugar
- 8 tablespoons butter
- 3 teaspoons baking powder
- 1 egg
- 125 ml milk


How to:
First butter and flour a round cake tin (diameter of about 28 cm). Preheat the oven to 175°C.
Cut the apples in small cubes and mix them with the two teaspoons of sugar and the cinnamon.
Mix the flour, the vanilla powder, baking powder, the sugar, ground oats and ground almonds.
Put the 8 tablespoons of butter in the flour mixture and mix it through by hand so that a course mixture is formed.
Mix the milk and the egg with a fork and add this to the rest of the ingredients. Then, mix until just combined.
Put 2/3 of the batter in the cake tin and spread the batter to cover the whole surface.
Then scatter the apple mixture on top of the batter. With a spoon, put some dollops of the rest of the batter on top of the apples. Try to spread the remaining batter as well as you can to cover the apples.
Put in the over for about 25 minutes or until lightly browned on top.
Serve slightly cooled. 


Smakelijk!


dinsdag 2 juni 2015

Orange and chocolate cake or Jaffa cake

Who doesn't know Jaffa cakes?

Jaffa cakes are (according to Wikipedia):
'... biscuit sized cakes introduced by McVitie and Price in the UK in 1927 and named after Jaffa oranges. The most common Jaffa cakes are circular, 2 and a half inches (64 mm) in diameter and have three layers: a Genoise sponge base, a layer of orange flavoured jelly and a coating of chocolate.'


In our house they never last long. My sister can eat a whole package of 16 Jaffas in a day and that all by herself. It's a wonderful flavour combination of course: orange and chocolate just go together very well.  

I decided to make Jaffa cake. Not the regular prepackaged Jaffa cakes but one real cake with an orange jam filling and a chocolate coating. The flavours are there but it's more of a filling dessert than the thin Jaffas. I bet only one piece is needed instead op 16 to still the craving :p


just underneath the chocolate, you'll find a thin layer
of orange, just like in the Jaffa cakes

For the cake, I made sort of a pound cake with Greek yoghurt. It would be great in a bundt pan but as I don't have one myself at the moment, I made it with a regular rectangular cake pan. Feel free to use whatever you want.


In my batter, I forgot to put salt. It didn't make it less good but it's better to add salt. Salt is an enhancer of anything sweet.
I also put a little orange zest to the batter which is totally optional as well.

The cake turned out very good. The cake is moist in the middle and the chocolate covers the crusty outer layer.

Ingredients for 10 slices:
- 280 grams plain flour (or 230 grams flour and 50 grams (1 package) of instant vanilla pudding powder like I did)
- 1 package of baking powder
- 1/4 teaspoon salt
- 300 grams sugar
- 225 grams butter
- 3 large eggs
- 
150 grams Greek yogurt
- optional: orange zest (half a teaspoon is sufficient)
- 100 grams orange marmelade
- 150-200 grams plain chocolate


How to:
Preheat the oven to 180°C.
Butter and flour a cake pan (bundt pan or rectangular shaped pan works best).
Mix the flour (and the pudding powder), the salt and the baking powder together.
Cream the butter and the sugar until light and fluffy by hand or using a mixer.
Beat in the eggs one after the other. When incorporated, add in the yoghurt. Mix very well.
Beat in the flour mixture gradually. Don't over mix but make sure all the ingredients are well combined.
Spread a little more than half the batter in the cake pan. Make sure the layer is evened out.
Spread the marmelade on top of the batter, making sure the marmelade doesn't touch the sides of the pan because otherwise it'll be a sticky business to get the cake out of the pan after baking.
Cover the marmelade layer with the rest of the batter. It's easier if you first fill the edges around the marmelade layer and then cover the top.
Put the cake in the oven for about 1 hour or until risen, golden brown and the top springs back when lightly touched.
Take out of the oven, let cool completely and take out of the pan.


Melt the chocolate and spread it over the cake on all sides.
You can use a brush to make this easier.


Let the chocolate layer dry and serve.


P.S.: Note that I didn't wait for the chocolate to set ... the result a slightly less  appealing (read: messy) piece of cake but as we like to say 'looks are deceiving, it's the inside (the taste) that counts!' :)

Smakelijk!


woensdag 27 mei 2015

Daring Bakers' May challenge: Lamingtons

For the May challenge, Marcellina from Marcellina in Cucina dared us to make Lamingtons.
An Australian delicacy that is as tasty as it is elegant.

This is my very first challenge as I only joined Daring Bakers' last month. I was attracted to the idea of trying new things, trying things that might be out of my comfort zone. I never followed any classes, I am a self taught cook and baker and I manage okay even with the few handicaps I have: I don't own scales so I always measure my amounts in spoonfuls. On top of that I live with my critical family that' liked to stick with their favourites. Daring Bakers will hopefully help me in taking up challenges I wouldn't normally try.


This month's challenge is Lamingtons. They are in essence bite sized sponges soaked in chocolate frosting and then tossed in dessicated coconut.
This is what they normally look like:


This is what I made:


The challenge stated that we had to make Lamingtons by making bite sized pieces of sponge or butter cake, soaked in a frosting and rolled in any kind of outer layer 'as to avoid messy fingers'. The cake could be scented or flavoured any way we liked and also for the frosting and the outer layer, we were free to choose whatever we liked.

As much as I liked the classic flavour combination, I decided to make something different too. With so much freedom, I thought about which flavours combined well and my mind was set on the flavours of a classic frangipane. Frangipane is a very popular tart that is made of an outer crust on which (usually apricot) jam is spread and which is then filled with a mixture of ground almonds, sugar, butter and eggs. The sweet filling combines well with the tanginess of the jam and that's what I wanted to recreate with my Lamingtons.

I scented the cake with almond extract to have that typical frangipane flavour. I then used strawberry jam to coat the pieces of cake and next I rolled them in ground almonds. I also decided to half the cake recipe as 12 Lamingtons would be enough for us to eat so I made 6 classic ones and 6 frangipane-inspired ones. 


the frangipane inspired ones with almond and jam


the classic Lamingtons with coconut and chocolate 

I made the cake the evening before and the cake looked very good, fresh from the oven, which was promising. As the recipe stated, I let the cake stand overnight to be able to cut it nicely the following day.

I invited a friend over and his verdict was very positive. He called them delicious. He tried both of the variations and loved them equally. He took home some other Lamingtons fo his girl friend to try as well. Hope she likes them just as much!
My mum came home and was in love with the frangipane inspired Lamingtons so I dare say they were a hit. And my own opinion: I loved the classic ones but that's no surprise because I'm a big lover of chocolate and coconut anyways.

With these kind of reviews and the ease to make this for the first time, I will make these again :D

Ingredients for cake:


- 2 eggs, 1 egg yolk
- 112,5 grams of sugar
- pinch of salt
- 100 grams corn starch (Maizena)
- 3/4 teaspoon baking powder
- 1/2 teaspoon almond extract
Ingredients for icing:
- apricot/strawberry/... jam (about 4 tablespoons)
- 30 ml milk
- 1 tablespoon of cocoa powder
- 100 grams confectioner's sugar
Ingredients to coat the Lamingtons:
- 75 grams ground almonds (I ground whole almonds in the food processor)/dessicated coconut
- 75 grams dessicated coconut
How to:
Preheat the oven to 180°C.
Butter an ovenproof dish (15 x 20 cm) and line the dish with parchment paper so that the cake won't stick to the dish later on.


Mix the eggs and the sugar for at least 5 to 10 minutes with a hand mixer on high. The mixture should be whitish and frothy.
Add the almond extract and mix another couple of minutes.
With a regular spoon, fold in the corn starch, the salt and the baking powder.
Put the batter in the lined dish and make sure that the batter is evenly distributed.

Put in the oven and bake for 22 to 25 minutes. Don't open the oven during baking. When ready, the cake should feel light and springy.
Let cool overnight in the dish. 


the cake will flatten while cooling

The next day, cut the cake in 12 pieces (I used a bread knife which cut clean pieces without crumbling the cake down). 


Warm the apricot/strawberry jam slightly to make it more pourable. Cut the cake pieces you're going to use in half and spread some jam in between so you get a little sandwich. Dip the 6 pieces of cake in the jam. Then roll them in the ground almonds one by one.
Warm the milk, cocoa and confectioner's sugar au bain marie (put a bowl into a pot of warm water to heat indirectly) until all is warm and dissolved. Dip the 6 other pieces of cake in this icing and roll them in the dessicated coconut.
Put them on a wire rack or on parchment paper for at least half an hour and up to 2 hours.


don't they look pretty on the inside as well?

from every angle ...
Ready to serve :)

Smakelijk!


vrijdag 22 mei 2015

Banana-chocolate cupcakes

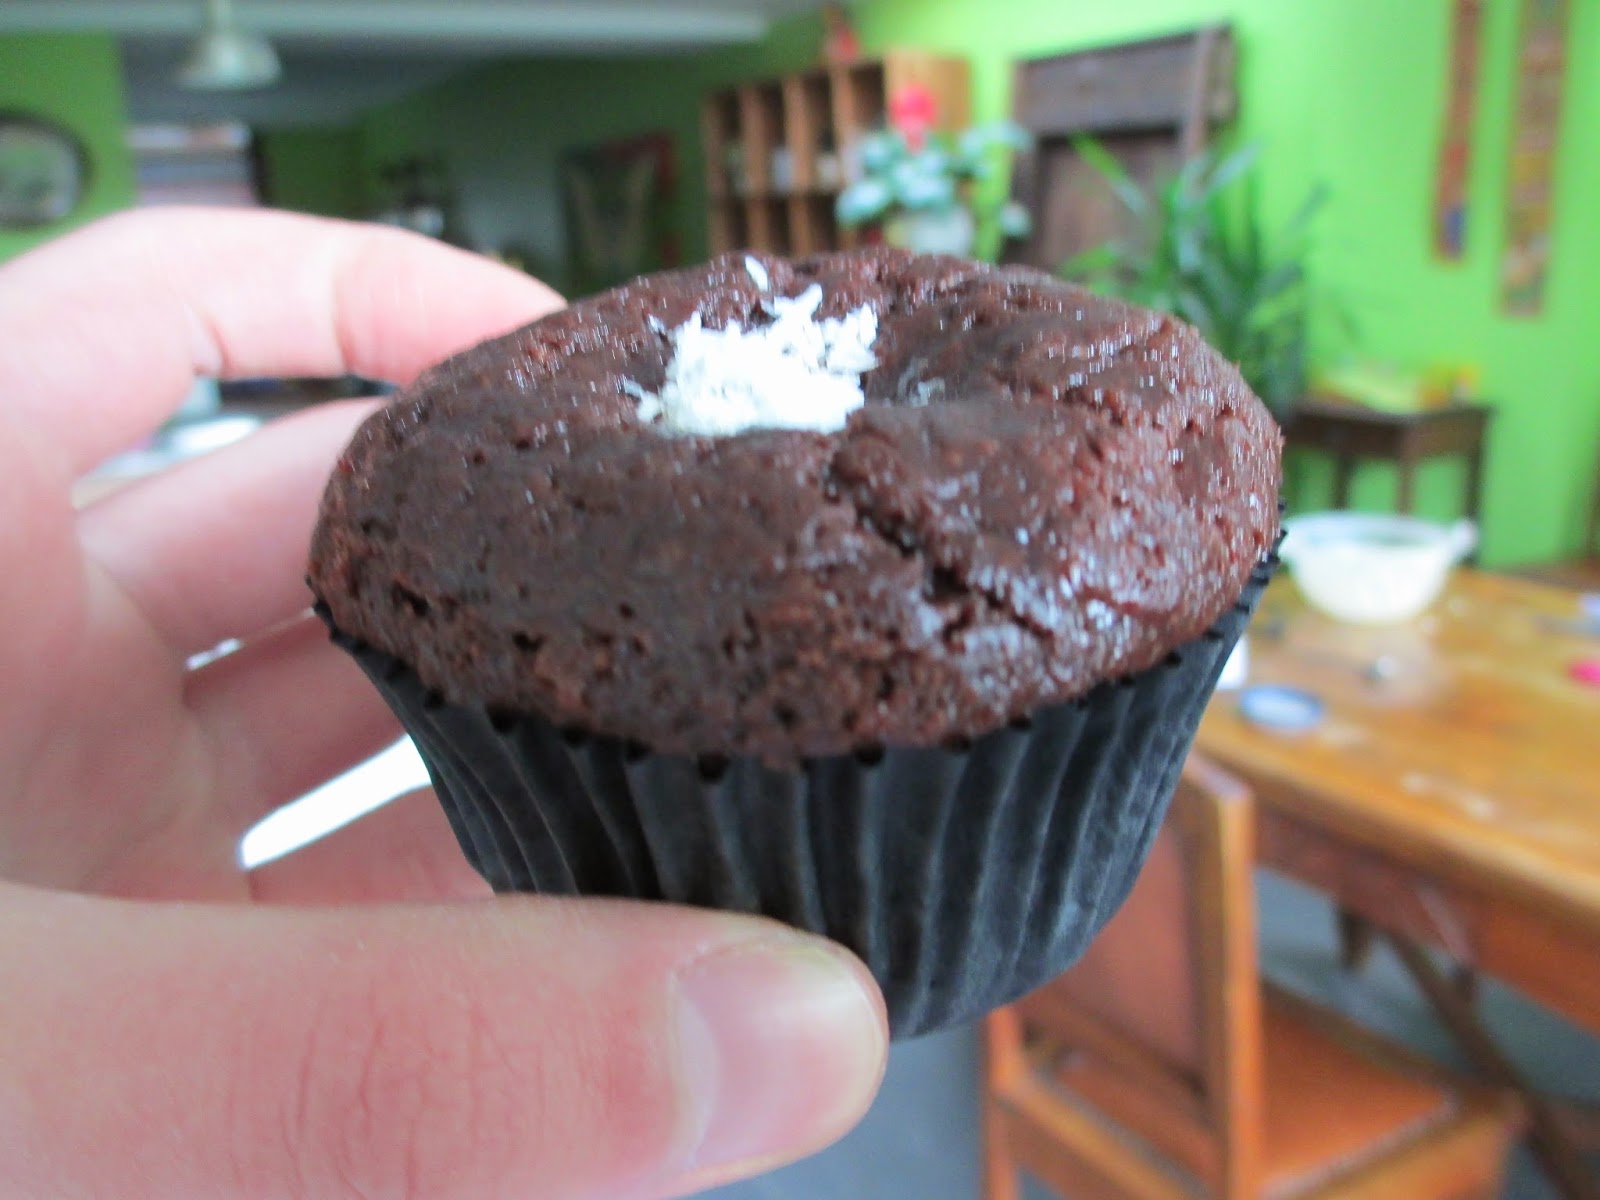
With my parents and sister going away for the long weekend and three ripe bananas left in the fruit bowl, I came up with a delicious idea: banana-chocolate cupcakes. Of course, of course, this isn't my idea. Hundreds of food blogs display pictures and recipes of these two ingredients combined. Even though I wasn't the most original, it was - in my opinion - a good way to 'dispose' of extra fruit.


sweet and luxurious!

You have to know that I'm not the banana addict. I'm a fruit consumer to the extremes. The reason is that I have the constant feeling of being hungry (is that normal?) and luckily I don't like most sweets nor savory snacks. I snack on fruit all day and when I don't control myself, the whole plate of grapes is gone in no time. My day starts with at least two oranges and on top of that I have at least two but more often than not 4 to 5 pieces. But banana is not one of them. I only like banana when it's incorporated into something else: banana cake, banana bread, toast with banana slices and chocolate, banana milkshake, ... My favourite combination is banana-chocolate. 


a little grated coconut on top

Something about my snacks in the more unhealthy category: The only sweets I love are, pudding (chocolate or vanilla is good but rice pudding is the best!) cakes and cookies (but then home made), and especially when they contain chocolate.

My everyday (yes, every day ...) after dinner snack is therefore a piece of cake or a cookie and when the weather permits (any day apart from the really sunny summer evenings when you feel like you're melting away in your chair - read: about 1 day a year in Belgium, on average - a cup of hot chocolate. 


Call me indulging, call me crazy, but that's the way I like to end my day. Healthy all day permits me to have a good snack that says: 'Hey, you've done okay, here's the treat you deserve!'

Ingredients for 6 cupcakes:
- 2 ripe bananas
- 35-40 grams butter
- pinch of salt
- 75 grams light brown sugar
- 1 egg yolk or 1/2 egg
- 1/2 teaspoon vanilla extract
- 1/2 teaspoon baking powder
- 1/2 table spoon cinnamon
- 38 grams flour
- 50 grams instant chocolate pudding mix (Oetker is what I used)
- 15 grams cocoa powder
- 100 grams chopped chocolate bar
- optional: a little grated coconut

How to:
Preheat the oven to 175°C.
Line a cupcake tray for 6 cupcakes.
Mash the bananas with the butter. Mix in the sugar, the egg, the pinch of salt, the vanilla extract and the cinnamon. Then add the flour, the pudding mix, the baking powder and the cocoa. Mix just until combined. Add the chopped chocolate to the batter and devide the batter over the 6 cupcake liners.
Put the tray in the oven and bake for 15-18 minutes.
Let cool slightly and take out of the tray to cool further on a plate or a wire rack.
When desired you can sprinkle some grated coconut on top. For an extra exotic accent.

Beware: they are rich! The chocolate is in there in the form of 3 ingredients and especially the chunks make these decadent. You will smell the banana well but in the taste the banana is only secondary to the chocolate that does take the lead. No bad deal for me of course! :)


All of this talk about snacks can be summarized to this: yesterday I had a great evening watching the Eurovision Song Contest snacking on a banana-chocolate cupcake. Two guilt pleasures at the same time and then it was only the second semi-final of this year (by the way: Belgium is in the final, something that doesn't happen every year ;) )


Today I started on my very first Daring Baker's challenge. The May challenge will be posted on the 27th of May, that's just a few days away and I'd been thinking when and how I would bake the challenge presented. I'm not telling you what it is of course. I will have only one person who'll know in advance and that will be the friend who's visiting tomorrow. Will talk all about the experiences of baking and taste testing coming week so stay tuned!

But today I have one of these cupcakes left and I will devour it tonight. 


woensdag 13 mei 2015

Simple apple and raisin cake

I was looking at half an apple my sister had left behind yesterday. She is allergic to apples but like to eat them so she eats half of an apple to avoid the most severe reactions but then we're left with left-overs. I'm not the kind of person to throw away food so I needed to rescue the apple from the trash (just saying: we wouldn't throw it in the trash, any left-over apple would be donated to the garden birds). 

Apple, some cinnamon and raisins make a perfect combination and a cake the perfect way to incorporate all of these ingredients.


This is a very basic cake recipe. It really is a granny's recipe and the beauty of it is that you can add anything - chocolate chips, apple slices, raisins and other dried fruits, ... - to it, just to your own taste. 

Ingredients:
- 4 eggs, separated
- 150 grams plain flour
- 50 grams instant vanilla pudding mix
- 1 packet of baking powder (15 grams)

- 200 grams white sugar
- 1 splash of vanilla essence
- 140 grams butter
- 1 full hand of raisins
- 1/2 big apple or 1 small apple
- 1/2 teaspoon cinnamon mixed with 1 tablespoon of white sugar


How to:
Preheat the oven to 180°C.

Soak the raisins in some water in a small bowl. Cut the apple into small cubes and mix with the cinnamon sugar.
Mix the butter and the sugar until soft. You see I don't own a Kitchen Aid so I do a real work out when making a cake ;)


One thing that's great about Summer (or Summer temperatures) - apart from the fact that it's simply the best season of them all - is that when you make a cake and want to soften some butter and mix it with sugar, you can simply set the bowl on the garden table and within a fraction of the usual time it's soft and ready. 

Add the vanilla essence to it and mix well. Add the egg yolks until incorporated.
Put the flour, baking powder and pudding mix to the batter and mix very well until no lumps remain. Then add the raisins (without the soaking water!).
Beat the egg whites until stiff and gently stir them into the rest of the batter.


Butter and flour a cake tin and put the batter in it. Spread the batter gently so that the top is evened out. Spread the apple cubes on top. 


Bake for 45 minutes or until the cake is set, golden brown and until a toothpick inserted in the centre of the cake comes out clean.  


Take out of the oven, let it cool completely and take out of the cake tin. 

Smakelijk!


maandag 20 april 2015

Trifles to share

If you ever wonder what to do with some cake that's left over, some cream in your fridge that needs to be used up or any type of fruit that's begging to be eaten soon, some booze in the cupboard, look no further: it's time for trifles!


Trifles are super simple and what I'm showing you isn't really a recipe. If you have above mentioned ingredients, you don't need to rush out to get something else (necessarily - unless you want to make them without having left overs or want to fancy things up with extras of course). 

Let me tell you the story of the heavy cream in the fridge:
At home we made waffles a couple of weeks ago for a bunch of family members that came over. In our waffle craze, we thought it was wise to buy more of every ingredient, just in case anyone went hungry (this is a typical Belgian trait, we always tend to buy a lot and serve a lot, even though we have already planned to eat something else the next day and won't be doing anything with the left overs ...). We didn't buy one liter of heavy cream but TWO. Two liters is a lot, I can tell you. Even after eating a pile of waffles each, the 10 of us, there was one and a half liters of cream left. Luckily we only whipped up one liter that time so we only needed to worry about working half a liter up as soon as possible. The other box would keep longer in the fridge. We made chocolate mousse with the left over half liter and that was that.


This week, we checked the box of heavy cream that had been in our fridge for weeks and we saw it was to be eaten this week unless we wanted to throw it away. 
What to do? What to do? We thought about inviting some extra people and eat waffles and my dad was all crazy about that idea as he LOVES waffles but we decided against it. Waffles for dinner two times in a month is really too much. 
Plan B was to prepare a number of things to use the cream up: we could use some for pasta alfredo and have a layer cake with whipped cream (these two things are going to be served to us and a bunch of family members who are again helping us out ^^)

For the cream that would be left (because pasta and cake on one night made with that much cream is a major attack on about everything healthwise), we would bake a batch of waffles for dessert for dad (waffles, strawberries and whipped cream, he'll be in heaven). And as 
I also had one piece of cake left over, it was decided I could make trifles. 

How to do this? Well that's very easy and a lot of fun with some children as well!

Take a piece of cake (regular, vanilla, yogurt or even chocolate), some fruit (berries are wonderful but it's all your choice), whipped and sugared heavy cream (40% fat is what I use). Those are the main ingredients but the trifle can be fancied up with a type of alcohol like Amaretto/marsala or decorated with almond slivers, grated coconut, chocolate sprinkles, ... The possibilities are endless: If you don't have cake, take biscuits and crumble them. If you don't have whipped cream on hands, use some vanilla custard.
The amount of each is not very important, if you prefer or have less of the cake it will be less heavy and more fruit makes it healthier.


Cut the cake in small cubes and sprinkle some drops of the alcohol on it if you like. I used some marsala for the almond flavour it gives. For my two glasses of trifle, I used 1 large piece of cake.


Take some fruit and cut it in smaller pieces. Fruit like raspberries don't need to be cut up, they're the right size. I cut the strawberries however, to have pieces the size of raspberries. When the fruit has the same size, it'll be a more even trifle in the end. I used couple of strawberries and raspberries. I didn't have them so I specially went to the shop for them, just because I wanted to eat berries in the trifle and not any other fruit (but that's me). 


Whip up the heavy cream with some icing sugar to taste. 

Then it's time to make the layers: Take a tall glass or any glass of any size you like. I took some larger round glasses and this makes these trifles BIG. Good to share or for big appetites :)  Smaller glasses are good when you need some portion control or when you serve it after heavy main courses.
With a little help from some spoons, layer the ingredients. I started with some cream, then some fruit and then cake cubes. You keep on layering until you've filled the glass. Anything left over can be eaten by the cook, the dog or anyone who's eyeing you hungrily. 

I wanted to decorate a bit with almond slivers but I couldn't find them. They must have been used up. But as they are just extra, no worries.

Put the glasses in the fridge until you serve them. 

Smakelijk!  

zaterdag 18 april 2015

Grape and yogurt cake

Weekend equals baking. Actually, any day I have time on my hands is a baking day. To my parents and sister and about every person who knows me a bit, it's not a surprise I baked a cake again. It's a good thing they've got good appetites!

I got some inspiration through the blog Laws of the kitchen. There I found a post about a grape harvest cake that looked really good. That cake was based on this recipe of grape harvest cake. I hadn't ever thought of using grapes in a cake or any other baked goods. I thought of grapes as fresh fruit and maybe a nice addition to hearty dishes like stews. This was a totally new thing for me. 


I took the recipe and by making some changes to the recipe I turned it into this cake. 
Below you'll find how I made it. 

Ingredients: 
- 200 grams vanilla scented sugar
- 100 grams light brown sugar
- 50 grams instant vanilla custard powder (I use Oetker)
- 260 grams plain flour
- 1 packet of baking powder (about 20 grams)
- 7 tablespoons of butter
- 236 ml milk

- zest from 1 orange
- 1 teaspoon salt
- grapes (I used about 20 pieces)
- 150 grams Greek yogurt

- 4 eggs
How to:
Preheat the oven to 160°C.
Mix the flour, the baking powder, the salt and the vanilla custard powder together.
Warm the milk and the butter with the orange zest until the butter is melted.

Crack the eggs in the bowl with the sugar and whisk with an electric mixer until the egg mixture is very frothy and light coloured. 


Mix the yogurt in the egg mixture. Whisk.
Mix half of the flour mixture in. Whisk.
Mix half the milk mixture in. Whisk.
Mix the rest of the flour mixture in. Whisk.
Mix the rest of the milk mixture in. Whisk.

Put the grapes in the batter and pour everything in a buttered and floured cake tin (I used a spring form tin of about 26 cm diameter)


Put in the oven and bake for about 50 minutes or until the cake feels firm when touched.
Take the cake out and let cool slightly. 

Take the cake out of the form, carefully because the grapes might stick to the sides and the bottom.


For serving: dust the cake with some icing sugar for a prettier look. 


My mum is my usual taste-tester and she liked it. She said that the grapes resemble raisins or currants but different. The orange zest wasn't that present but it was good, she said.
She happy, me happy!
I took a piece as well and liked it as well. It's a dense cake and I would make it again as it has a hint of citrus, a good vanilla flavour and the grapes make the cake juicy. 

Smakelijk!

dinsdag 14 april 2015

Baking with evaporated milk

I went to Costa Rica last year and spent 4 months in a host family and volunteered in different social and nature projects over there. 
Because of this time in a host family, you get to new local customs much easier than when you spend all your time in a hotel that is no different from whatever hotel anywhere else in the world. I loved it!


My host mum Cecilia was a real foodie. Her husband Carlos was in good hands because even though he didn't know a thing about cooking, he was fed very well.
She was about as old as my grandmother and just as my grandmother, she loved to cook (guess from who I got the foodie-genes).

She would stuff me every day. I got a huge breakfast every morning: always a plate of at least 4 types of fruit, tea (without milk, Belgian girls don't drink milk in their tea and even after trying, she couldn't convince me) and a changing assortment of dishes going from eggs and frijoles molidos to arepas (pancakes) and from toast with Costa Rican cheese to fresh French loaf grilled cheese sandwiches.
Every night I got a three course meal and convincing as she was, I always had seconds.
I obviously gained quite a bit of weight. Even after 2 food intoxications and all the symptoms that come with it, I gained 6 kilos!

I never complained and had the most memorable moments with them and their family. Especially Christmas and New Year's Eve were very good and even though my own family was far away in Belgium, I felt I was really part of their celebrations. 

On New Year's Eve there I had my first experience with queque con tres leches. It was Cecilia's daughter, a professional cook, who made it and it was soooo good. It was a very small piece and I just wanted more afterwards. 

Back in Belgium, I treated my family with some Costa Rican food. I also made a tres leches cake because I liked it so much. 
I bought all the ingredients and set to work. It was the first time to use evaporated milk and condensed milk. And the result was very nice. My family liked it but remarked that the pieces should have been a lot smaller. They were stuffed! I guess they were right, so many rich ingredients together made a very dense cake.

That was more than a year ago and this week I made my second attempt at baking with evaporated milk. I made a cake based on the recipe on pinchofym.com where Lindsay posted a nice looking marble cake made with evaporated milk. She warned her readers that the cake is addictive and also a lot of comments suggested that it was very worth making it. As I found my last attempt at baking with this milk very agreeable, I tried it.


I almost made the recipe completely according to the instructions of Pinch of Yum but added a chunk of dark chocolate to the dark batter so that the chocolate flavour would be axtra rich. I also had a slightly bigger can of evaporated milk so I multiplied everything by 1.5 to be able to use all of the can and not be left with a third of a can in the fridge. In Belgium we use the metric measures so I converted them also to work with. 

I baked the batter in a rectangular cake tin but after 45 minutes the batter still wiggled in the middle while the outer parts were set. Because of opening the oven before the middle was set, the cake collapsed. I was a bit impatient because I took the cake out of the oven anyway (I was also a bit scared the cake would dry out too much in the outer parts). 

I covered the top of the cake with some white chocolate and even though the cake wasn't a beauty and wasn't set at all in the middle, everyone liked it anyway. Eveything disappeared and this is the last piece which I will eat right now:


I guess if a cake is a success when it fails, the recipe is a keeper. You have to have a sweeth tooth of course, as the the combination of chocolate and sweet evaporated milk suggests.

Next time I will make cupcakes with this batter, they will set more easily and it's a much better way to have portion control ...

I recommend making this recipe also!

Smakelijk!